

In this tutorial, we will cover how to connect wallets to your React dApp using Web3Modal.
Introduction
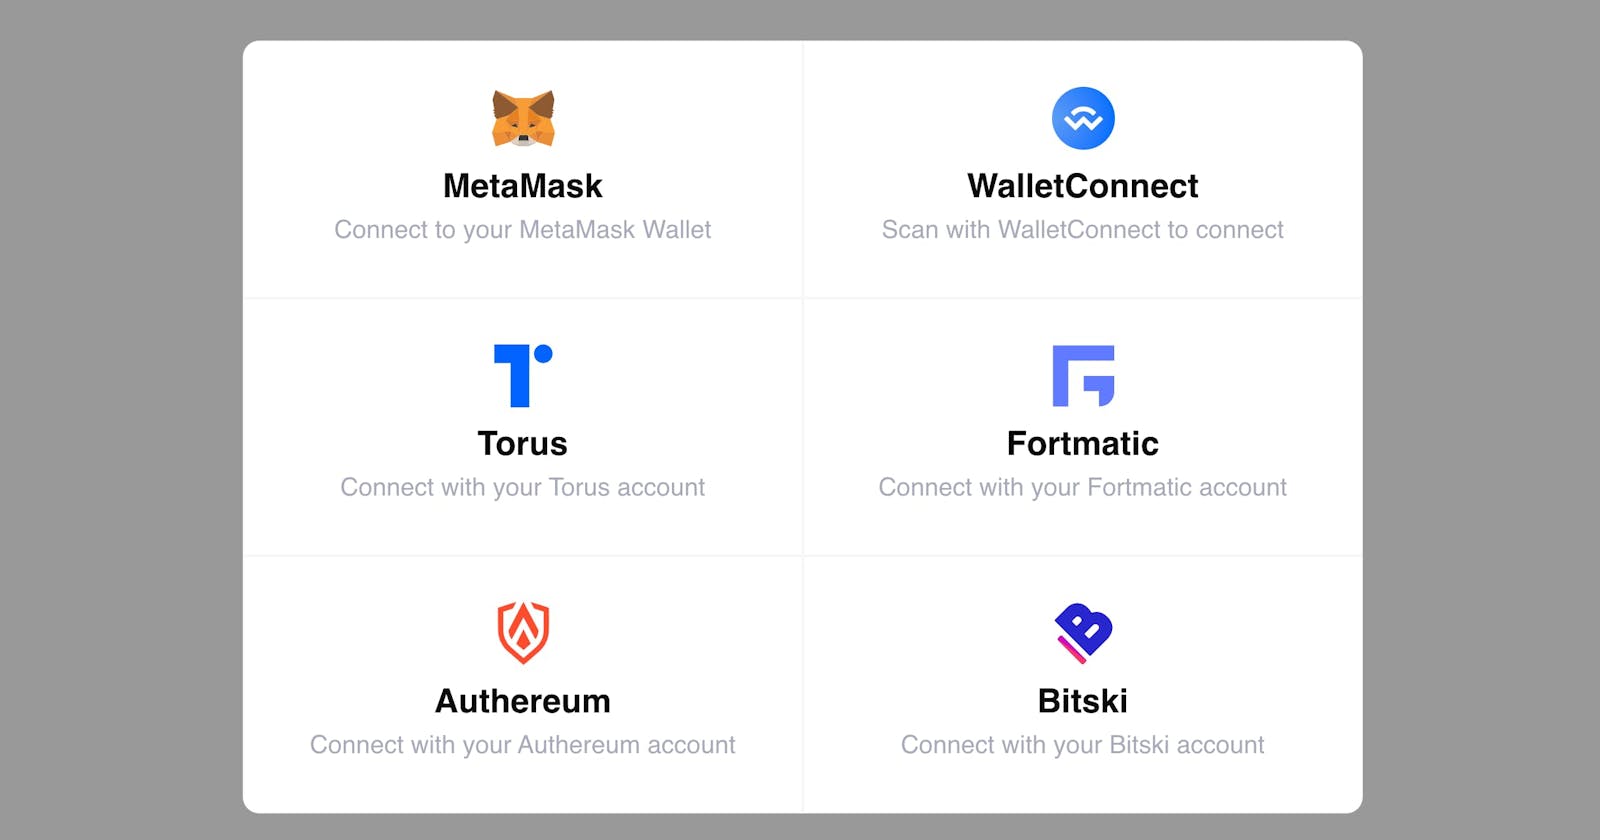
Web3Modal is a library that helps developers connect their decentralized applications to various Ethereum wallets like MetaMask, WalletConnect and more. By using Web3Modal, users can interact with your dApp using their preferred wallet. The library provides built-in support for React and seamlessly integrates with the popular React-hook library called wagmi.
It takes away the complexity of dealing with different wallet providers and allows users to connect and interact with dApps using their preferred wallet or provider. This is done to improve the user experience and accessibility of decentralized applications.
Web3Modal works well with multiple programming languages and frameworks including React, Angular, Vue.js and more, making it a versatile tool for building decentralized applications.
Prerequisites
Basic understanding of Reactjs and Nextjs
Node.js and npm installed on your system
To proceed, visit WalletConnect Cloud and either login or create a new account.

Once you are logged in, create a new project or use an existing one and copy the associated Project ID. This Project ID will be required in a later step of the process.
Install Packages
Install Web3Modal packages inside your app using the following command. Ensure you have the latest version of tools associated with your application.
// Install the package with npm
npm install @web3modal/ethereum @web3modal/react wagmi ethers@^5

// Alternative installation method
yarn add @web3modal/ethereum @web3modal/react wagmi ethers@^5
Set Environment Keys
Create a .env file in your app folder and add your project ID.
# Get your Project ID  at https://cloud.walletconnect.com

NEXT_PUBLIC_PROJECT_ID=" paste your project ID here"
Import Packages
Next, import Web3Modal, Wagmi and chains libraries in your React component file. Locate the entry point file of your React app.
This is usually in the src/index.js file if you used CRA or pages/_app if you are working with Next.js. In any case, you want to make you are importing your packages where the ReactDOM.render function gets called.
import {
  EthereumClient,
  modalConnectors,
  walletConnectProvider,
} from "@web3modal/ethereum";

import { Web3Modal } from "@web3modal/react";

import { configureChains, createClient, WagmiConfig } from "wagmi";

import { arbitrum, mainnet, polygon } from "wagmi/chains";
These were the packages we initially installed. In the last import, we only called three chains but we can add more chains as we wish.
const chains = [mainnet, polygon, avalanche, arbitrum, bsc, optimism, gnosis, fantom]
Configuring Web3Modal
const { provider } = configureChains(chains, [
  walletConnectProvider({ projectId: "<projectId>" }),
]);
const wagmiClient = createClient({
  autoConnect: true,
  connectors: modalConnectors({
    projectId: "<projectId>",
    version: "1", // or "2"
    appName: "web3Modal",
    chains,
  }),
  provider,
});

// Web3Modal Ethereum Client
const ethereumClient = new EthereumClient(wagmiClient, chains);
Wagmi Client
The Wagmi Client can be used with any web framework. It facilitates the management of wallet connection state and configuration through a set of features, including connection establishment, compatibility with connectors and ethers providers.
AutoConnect
AutoConnect allows you to reconnect to the last connector upon mounting. It can be set to true or false based on user preference. By default, it is set to false but when you set it to true, it enables the user to quickly resume their previous connection without the need to manually re-establish it.
Connectors
Connectors component that facilitates the process of linking accounts and allows users to establish a connection between their digital wallets.
Wrap your app with WagmiProvider and add Web3Modal component
function App() {
  return (
    <>
      <WagmiConfig client={wagmiClient}>
        <HomePage />
      </WagmiConfig>

      <Web3Modal
        projectId="<YOUR_PROJECT_ID>"
        ethereumClient={ethereumClient}
      />
    </>
  );
}
It is advisable to place the component in a separate area that is distinct from your main application in order to minimize the amount of unnecessary re-rendering that may occur within your application. By doing so, you can potentially reduce the overall workload and optimize the performance of the application.
Add Connect Wallet Button
To add a connect wallet button, we need to import Web3Button and Web3NetworkSwitch packages into our app.
import { Web3Button, Web3NetworkSwitch } from '@web3modal/react'
We can now go ahead to create a component for the Wallet Connect Button.
export default function HomePage() {
  return (
    <>
      <Web3Button icon="show" label="Connect Wallet" balance="show" />
      <br />

      <Web3NetworkSwitch />
      <br />
    </>
  )
}
Connecting wallets to your React dApp using Web3Modal can enhance the user experience of your application. Users can connect to various wallets with just a few clicks, making it easier to interact with your dApp.